 RawGuard
The whole routine at a glance
| When | What | Why |
|---|---|---|
| Day before | Format cards in camera, check drive space | No surprises on the day |
| Wedding day | Swap cards at breaks, wallet them | A full card is never reused by mistake |
| That night | Back up to two drives, verify | The shoot is safe before you sleep |
| Next day | Cull in two passes | Fresh eyes make better picks |
| Then | Picks into Lightroom, edit | Edit only what you'll deliver |
| After delivery | Third copy elsewhere, format cards | The archive outlives any one drive |
Before the wedding
- Format every card in the camera you'll use it in, after its last shoot is safely backed up. Never format on the computer.
- Use both card slots if your camera has two. Set the second to record a backup copy, not overflow. A card can fail during the day, and the second slot saves you.
- Check both drives have room for your biggest wedding, with some to spare. Finding out at midnight is worse.
- Pack the card reader and its cable. A reader left at home turns a backup into a problem.
During the day
- Swap cards at natural breaks: after the ceremony, before the reception. Not in the middle of the vows.
- Keep a card wallet. Empty cards one way up, full cards the other way, and full cards never go back into a camera.
- Don't delete in the camera to save space. It's slow, it's easy to delete the wrong frame, and you'll judge better on a big screen.
- Keep the cards on you, not in a bag left by the dance floor.
The night of the wedding
This is the step that can't wait. Before you sleep, every card goes onto two separate drives, and both copies are verified: read back and compared with the card. The two-drive guide covers how, and the verification guide covers why it matters.
- Every card backed up, including the second-slot cards if you need them.
- Both copies verified, with no files missing or failed.
- Cards back in the wallet, untouched. Don't format them yet.
- The two drives in different bags on the way home, if you can.
Then stop. Culling at 1am after a twelve-hour day is how good frames get rejected.
The next day: culling
Culling goes faster and better in two passes than in one slow one.
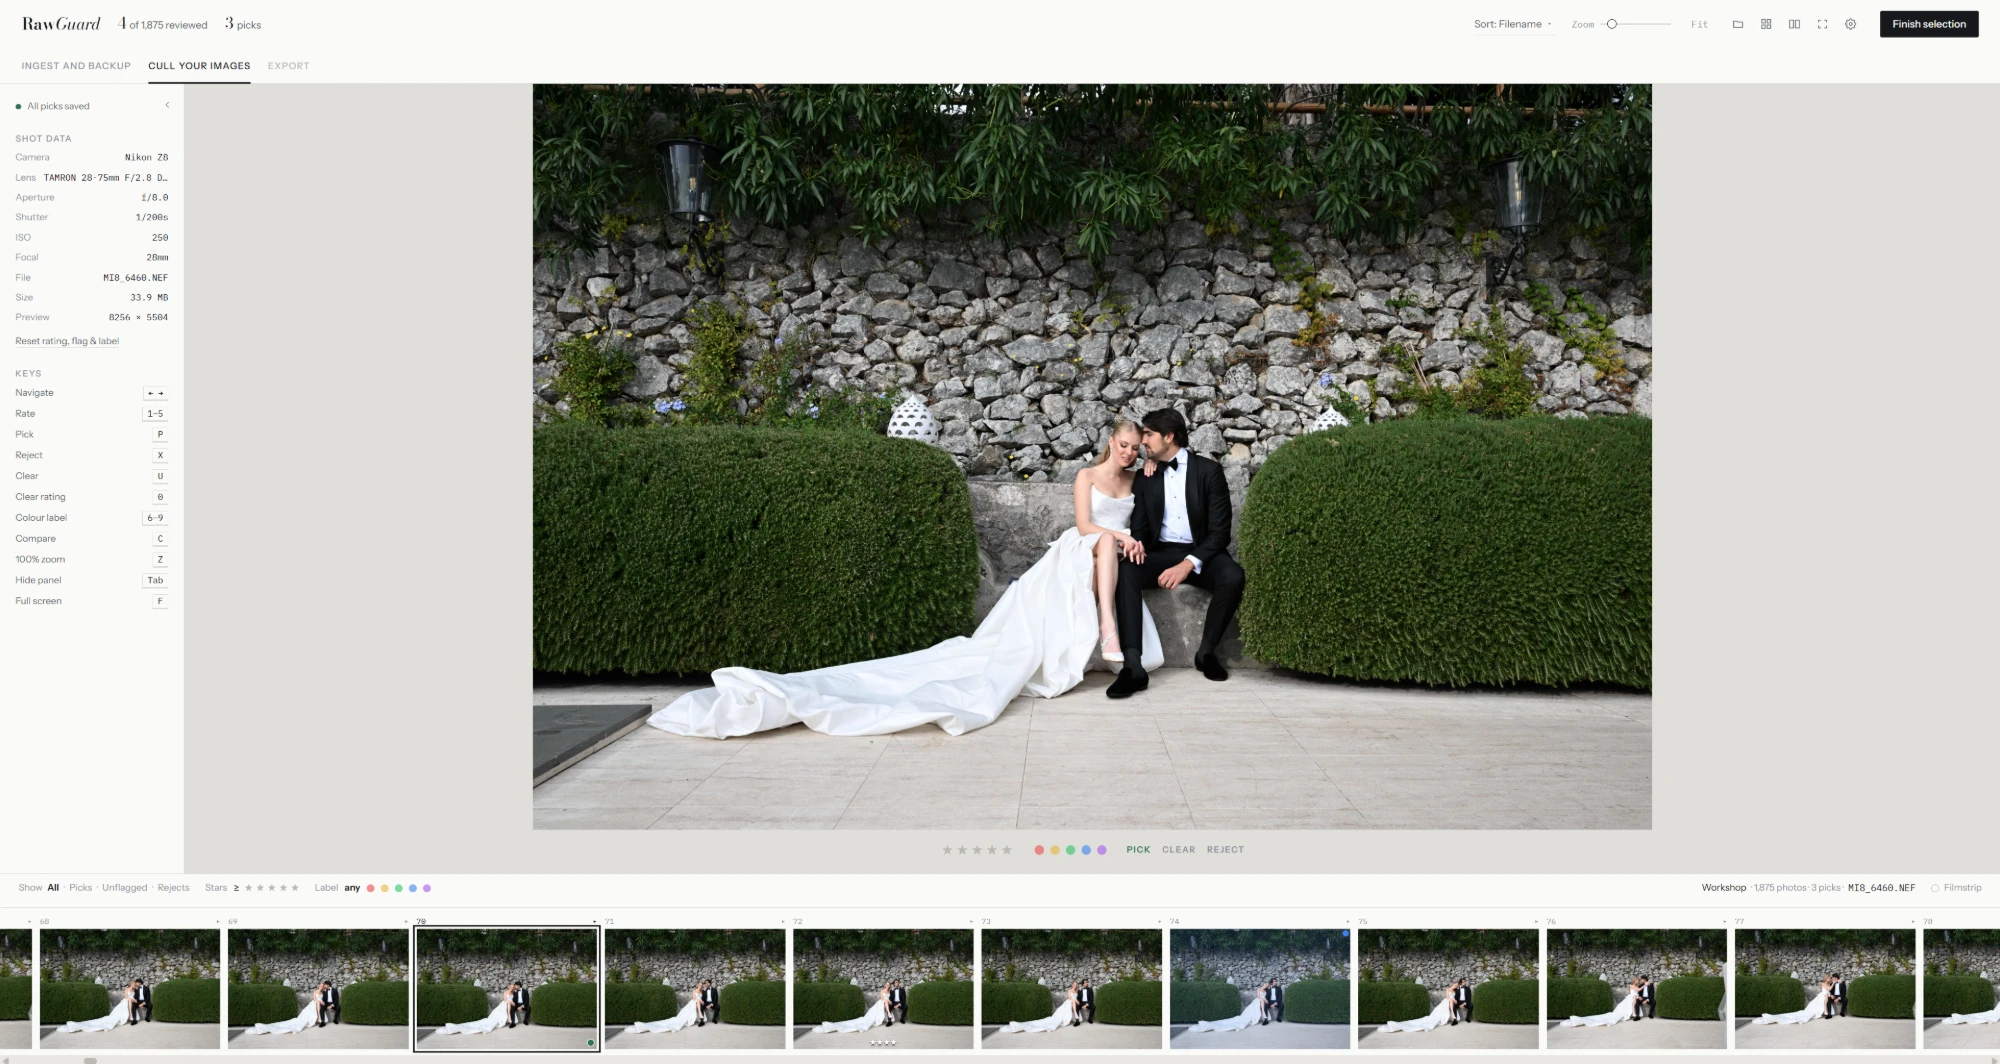
- First pass, fast. Go through every frame once. Pick what's clearly good, reject what's clearly not (missed focus, closed eyes, a guest walking through). Don't agonise. Leave the maybes unflagged.
- Second pass, careful. Look only at the picks and maybes. Compare similar frames side by side, check focus at 100%, and keep the best of each moment.
- Mark the extras. Stars for album candidates, a colour label for sneak peeks or the photos the couple asked for.
Lightroom's keys are the common language here: P pick, X reject, U clear, 1–5 stars, 6–9 colour labels. Whatever you cull in, using the same keys saves you relearning them.
Getting the picks into Lightroom
The cleanest handover is XMP sidecars: small files beside each RAW that carry the ratings, labels and flags.
- Stars and colour labels are read by Lightroom Classic when it imports the photos.
- Pick and reject flags are read from sidecars by Lightroom Classic 13.2 and newer.
- Already imported? Select the photos and choose Metadata, Read Metadata from Files.
Then filter by the pick flag and edit only what you'll deliver. A list of the picked file names is a handy backup: paste it into Lightroom's text filter to find the picks again.
Delivery and archive
- Make a third copy kept somewhere else: another building or cloud storage. That completes the 3-2-1 rule.
- Keep the second-slot cards until the couple has their photos, if you can spare them.
- Then format the cards in the camera, and they're ready for the next wedding.
Where RawGuard fits
RawGuard covers the night and the next day in one app. On the night, it backs up every card to two drives in one pass and verifies every copy, with a checksum list and a report on each drive. The next day, it opens the same shoot for culling with Lightroom's keys, Compare and 100% zoom, saves your picks as XMP sidecars, and copies the picked file names for Lightroom's filter in one click.
Questions
- Should I cull on the night of the wedding?
- Back up on the night, cull the next day. The one job that can't wait is getting every card onto two drives and verified.
- How many photos should I deliver?
- It depends on you and the package. A common guideline is around 50 to 100 photos per hour of coverage. Every delivered photo should earn its place.
- How long should culling take?
- With two passes and keyboard shortcuts, a full wedding is usually a matter of hours, not days. The fast first pass does most of the work.